Moodle™ needs makeup!!! ? But high Moodle™ customization cost holds you back!!!???
YES!! This is what most moodlers think, including you, right! I know, I’ve heard this a lot of times.
Now, Moodle™ is great! It has the features and functionality needed for e-learning. But it does not consider user experience at all! 🙁
One obvious issue is the look and feel of the LMS. Let’s quickly go over all the problems. I promise, I’ll be quick! 🙂
Moodle™ Problems
==> The look and feel is old fashioned and unfriendly
==> The navigation is slower and complex
==> The settings are not straightforward
==> The customization and branding options are limited
==> The courses don’t look pretty or organized enough
==> There is no dedicated page builder and so on….
You must’ve realized by now, that this list would be huge if I kept going. Just wanted to pep you up a little bit and put you in the thinking mode 😀
Now, we’ll do the wiser thing! S-T-O-P the rant and discuss the best possible solutions to tackle these problems 🙂
Here we go!
5 Best Ways to Improve Page Design & Save Moodle™ Customization Cost
#1 Make the most of Resources for Course Design
It should be easier for your learners to identify things on screen and keep them interested in using your e-learning site.
The flat structure of your courses without any collaboration or resources can affect student engagement.
Resources are flexible and easy to use – They can be edited, hidden and moved across the course page.
For example, you can embed activities and online discussions in a Book resource to encourage learners to participate proactively.
Similarly, there are a bunch of effective resources that you can use to ensure the interaction doesn’t fade away.
Another resource you could use is Labels. Labels in Moodle™ are a great way to perk up your course design. You can use simple text-based labels to create subheadings in each section.
The best part is that you can embed anything in a label – an image, youtube video, or any other digital media. Also, you can set access permissions and make them visible to the learners only after they complete a particular task/activity – something like unlocking a coupon!

In the above example, the learner doesn’t get to see the “Mission Complete” label until the three compulsory activities listed are done successfully.
This way, you can use various other resources for improving your course design such as File, Folder, URL, Page, IMS Content Package etc.
#2 Strike a Golden Balance Between Text and Images
So, cut out unnecessary textual content on your course page. It’s always advisable to throw relevant images in the mix. And don’t forget to provide images with Alt Text.
To quickly help learners consume content and navigate through your items easily, avoid making long, text-heavy course pages or sections that involve endless scrolling.
Ditch the boring text to use slideshares, music, podcasts, videos and screencasts, link to web pages or link to downloadable resources
You could also support your textual course content with charts, tables and graphs for better understanding of concepts – a great way to help skimmers process information
Size Guidelines for Images on a Course Page
Use the guidelines below to avoid large images that can require extra scrolling and slow down your course page loading.
| Image Use | Image type | Pixel Dimensions |
| Thumbnail image | A small illustration, sometimes links to a larger version. | ~ 100 pixels wide |
| Course image | Image to replace default course image at top of the Course page | 1200 x 800 pixels |
| Block image | An image placed in a Moodle HTML block. | No more than 340 pixels wide |
| Illustration | An image placed in a page of text (avoid on course page). | Up to 1200 pixels wide* |
*Moodle™ will automatically make large images fit in the available area of the page, but the full-sized image file still downloads to browsers. Pages load faster if you resize images before uploading them to your course.
#3 Make the Course Intro Better for Better Visual Engagement
How your course introduction looks matters a lot. This can be done in many ways:
- Add a custom header image at the top of your Moodle™ course page
- Come up with a good-looking, relevant, high-resolution course logo
- Add your photo, profile and contact information to keep the human touch, and create good student-teacher relationships
- Be welcoming by adding a short course introduction video. Here, you can answer most of the course FAQs that your learners might have
- Quick starter guides on how to go about the course, where to find things, what to do or where to go in case they’re stuck, basic instructions to follow for the students etc.
#4 Choose the Right Course Format
Your e-learning needs will dictate how you want your course to look. There are several course formats in Moodle™ to improve your course presentation. And each has their pros and cons. They’re super simple to use and you can switch from one course format to another quite easily.
Edwiser Course Formats – a free Moodle™ plugin, offers 2 sleek layouts to make your courses look more organized and easy to find or navigate. They are 100% compatible with all the standard Moodle™ Course Formats as well as the Edwiser RemUI theme. So, no worries there 🙂
Faster course navigation is also one of the top concerns of several moodlers. And the perfect course format best suited to your requirements can make a world of difference. So, make sure you pick the right one!
#5 Maintain Consistency in Page Layouts
To simplify Moodle™ for users, it’s important to make Moodle pages look like a website – modern, attractive and professional with cleaner navigation.
You want a certain level of sophistication to the user interface. But you’re not a seasoned moodler ?This is the time when you should consider using a good theme.
Why a Moodle™ theme??
- Any given Moodle site looks super basic and needs to have catchy graphics and good colour schemes
- They offer pre-built designs and templates for different pages so getting started is simpler and snappier
- It not only makes the LMS attractive but also allows you to edit and configure things easily; as well as effectively use the front page to promote new course offerings to get people to click to learn more or to register.
- A good theme makes Moodle™ customization-ready. So, adding some personality to the site and effective branding becomes easier
- Apart from multiple customization options, you also get the benefit of better usability and dedicated support
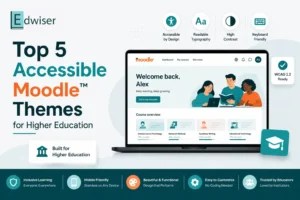
Edwiser RemUI is a premium theme that offers all the above features.
For faster Moodle customization, It even comes with an all-in-one page builder to create customized page layouts using custom Moodle™ blocks.
You can quickly build your Moodle™ pages and decide the layout and elements all by yourself without writing any code.
The only action required is – Drag-and-Drop! Because all you have to do is drag-and drop the elements you need on the page and craft your own layouts in minutes
In Closing
So, that’s the complete list for you! You’ve just saved so much time, money and effort on Moodle™ customization!
Now you know what to do when your Moodle™ experience takes a backseat 🙂
Hope you found the article helpful. Let us know your thoughts in the comments below.


One Response
Hello test