Are you tired of looking for ways to make your Moodle™ site more professional-looking and functional? Is there something that’s telling you to level up in terms of designs and features?
Or do you think you need to build a new site all over?
If you said yes to the above questions, then keep reading to know how you can improve your Moodle™ site.
Moodle™ is a widely-used Learning Management System but it is dated when it comes to user experience. It will not give you a lot of freedom to create your new site whereas using Content management systems such as WordPress or Joomla will give you much more power to manage and manipulate the way visitors access your information.
While your courses may be valuable, they may fail to interest your learners due to poor presentation and interface.
So, what do you do? Switch to WordPress or Joomla? Neither because we have an easy and cost-effective solution for you!
Pull your socks up and get ready to learn a bunch of things!
Building a website with Moodle™
Here’s a summary of Russell Stannard’s video
Did you know that you can make yourMoodle™ site function more like a website? There are some tricks that if used can make your Moodle™ site seem as if it’s a website where you don’t have to have loads of links on the page but you can instead use buttons to click and open up different pages.
This trick really can change the way you create your content in Moodle™.
So let’s begin with creating a course. While creating a course, you need to right-click and add a new page and give it a title. Add content (video) and its description.
And then you’ve to create a button to click on that course which can take you back to the content to move back again afterward.
To create units under your course you’ll need to add content or resources, for example, unit 1 of the course.
- Click on a page and add content or a video course to the unit.
- Click on save and return to course so you’ve created content which is going to be unit 1 now all you need to do is to add a button to go back to the page and just edit the kind of header that you get on every single block on Moodle™.
- Click to add a topic and write a description.
- Now, we’ll simply add the button. Go to your files (pick an image that says unit 1 for your button) upload that into Moodle™ give it a title and then add that onto the screen so we’ve now added the button!
- To check if that button is clickable, go back and right-click over the unit content of the actual file. In this case, it’s a page. Now, copy the link address then come back to unit 1, click on edit topic and then simply click on that button and add a link.
- It should open in another window, if it does then you’ve successfully added the button. By using this trick of adding buttons that take you to another window, you can make your Moodle™ site experience feel like a new website to your learners.
A Step by step guide to Create a Moodle™ Site (With Great Functionality)
Step 0 – Pick your domain name & web hosting
When you think about setting up an e-learning website on Moodle™, the thought leads you to find a proper hosting solution. For a popular platform like Moodle™, there are plenty of options to choose from.
To know how to pick the right hosting provider for your Moodle™ site, check out this article – Top 11 Moodle Hosting Providers.
Step 1 – Install Moodle™
If you have already set up a Moodle™ site then you can skip step 0.
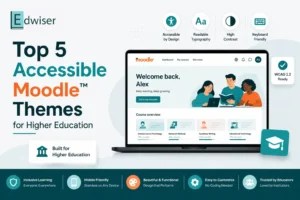
Step 2 – Choose the right Moodle™ theme
Choosing the right Moodle™ theme can solve half of your problems, trust me on this. Your Moodle™ needs an attractive theme that looks modern and professional to give the best user experience.
There are tons of Moodle™ themes out there in the market but there are a lot of factors to consider while choosing the right theme for your LMS.
While colors can do the magic, navigation should also be an important feature in your checklist. There’s more to look for like enhanced design, functionality, customization options, compatibility cost, and support.
These work together to improve user experience and keep your learners engaged.
Moreover, picking the right theme will complement your brand identity.
To get a detailed checklist of an ideal theme, you can go through this article.
And if you’re running short on time to do all the research, just read this theme comparison article to pick the ideal theme for your Moodle™.
Note: If you are already using a MoodleTM theme and are afraid to switch to a new one, then you can reach out to us. The Edwiser team would be happy to help 🙂
Step 3 – Import Demo content to set up initial courses
After giving a great look to your Moodle™ with the right theme, you’ll need to set up initial courses. Now, setting up courses may take a lot of time. Too tied up?? No worries!! You can use the Demo importer.
It allows you to easily import readymade Homepage or Course page templates to your site. Just replace the content with yours. Here are some available courses for you to check out to see how it works. Not all themes have this feature.
Save time plus and make your job 10x better!
For importing your favorite homepage and course page designs, simply navigate through the site administration. You’ll find two sections of templates i.e Homepage and Courses on the Importer page. That’s it, you can go ahead and start the process.
Step 4 – Make your pages look modern and professional
Enhancing the page layouts can be tricky in Moodle™; they hold your courses in the background with grace. And they play a key role in determining the overall look of your site.
Learners are mostly drawn to user interfaces that are engaging and user-friendly. When you put some effort into customization of your Moodle™ with the users in mind, it’ll leave a great impression on your learners.
Moreover, customizing your Moodle™ with easy navigation and strong visual branding will help your learners know what exactly to expect.
In order to make your pages look modern and professional, you can use Edwiser RemUI’s custom page builder. It helps you to get uniquely designed pages from scratch without touching the code!
It allows you to build customized page layouts with simpler drag-and-drop options. You can also create responsive blocks that support heavy media. To learn how to create custom pages in moodle, read this article.
Step 5 – Create & manage courses
Running a Course in MoodleTM
Now, we’ve worked hard enough to improve the layout of your website with a fresh touch of colors but the looks are incomplete without smooth functionality in any e-learning site.
So, let’s know how you will run and administer your course at a very basic level.
Improving Course Display
First, make sure to organize your course content and make it more pleasing and systematic with the help of course formats. Moodle™ provides various course formats to make this task a bit easier.
If you don’t want your learners to drop off in the middle of the course, the course format that you implement must offer a clean, uncluttered design. With this, your students will have better control over the course they are learning and this can increase the levels of engagement.
Check out the Edwiser Course Format plugin. This will enable you to provide your learners with an enhanced UX throughout the entire course. Besides, they are 100% compatible with the Edwiser RemUI theme.
They are responsive and come with easy course navigation. A handy progress bar for all course activities and its minimalistic design are some of the highlights.
Tracking Course Engagement
There are two ways to go about reporting in Moodle™.
- You could use the plugins from the plugin directory. Here’s a guide to help you with efficient analytics and reporting
- We got you covered with a smart reporting solution – Edwiser Reports. It’s FREE
Note: Edwiser RemUI theme too comes equipped with a dashboard having multipurpose premium custom blocks such as:
Course Analytics block is used for Graphical representation of the learner’s last attempt in the gradable activities of a specific course to the global average in that course. Recent Feedback block displays a recent submission done in the course so that it is notified to the teacher Recent Forum block displays recent activity related to the user in the forums Course Progress block displays students’ progress to the teacher Manage Courses block is for teachers to track the progress of students in a course as well as quickly access user enrollment, course editing options, etc You can easily customize your dashboard as per your necessities. |
There are more such custom blocks for simpler navigation, better reporting, and a powerful course structure that will eventually help you run your courses with effortless ease.
The formula is simple here, happy learners = happy YOU!
Step 6 – Build an interactive student-teacher system
Engagement is a vital component that keeps your learners active. Learners can determine the reliability of your site by looking at the interactions that take place in your site. So, it is important to build an interactive learning environment that reflects your quality of teaching.
To increase the level of engagement on your site, you can add features that let your learners communicate with you and among themselves. Features such as gamification, forums, blogs, video conferencing can increase interactions significantly.
Here’s how you can use them to level up interactivity in your Moodle™ site:
Gamify and promote proactive e-learning
Gamification is no longer a buzzword. Almost all Learning management systems have this feature. Gamification is used to motivate students and encourage excellence among students. Gamification is one of the top 10 must-have features of a learning management system (ProProfs, 2021).
Gamifying course activities will give your learners a sense of achievement. MoodleTM offers a number of gamification plugins such as Level Up!. It allows learners to see their progress in points.
To get a brief review of the plugin Level Up!, read this article.
Use badges for learner motivation
You can also motivate your learners’ by awarding them certificates and badges. By using Badges as a reinforcer, you are encouraging them to create and share interesting content.
Leverage video conferencing tools for better collaboration
Roll out new ways to connect with your students through videoconferencing.
Interact with your learners by conducting weekly sessions to resolve doubts or deliver some extra knowledge that can be useful for your learners. You can host real-time meetings with the help of some popular MoodleTM plugins for videoconferencing.
Webinars are so popular in today’s times, mainly because it has made sharing knowledge easier due to its virtual nature. If you want to conduct webinars for your learners but don’t know how to create them, this article would guide you through simple steps.
Step 7 – Use groups or cohorts in MoodleTM
MoodleTM is based on the Social Constructionism pedagogy, which means that we learn particularly well by creating or expressing something for others to see. This strong principle has been supporting MoodleTM since the beginning and it might support you too if you follow it the right way.
Here’s the WHY behind creating groups or cohorts in MoodleTM:
- Learning becomes more interesting when it involves the exchange of knowledge among peers. So, creating groups and cohorts can encourage your learners to provide answers to one another, even teaching them what they know, just by sharing something in the group.
- By creating groups or cohorts, you can make your class bond with each other, which is rare in online learning mode. This interactive feature can also increase engagement in your MoodleTM site consistently.
- There is a difference between groups and cohorts. Groups allow teachers to manage students during a class, whereas Cohorts enable administrators to enroll and unenroll students altogether.
- You can create groups and allocate a particular course activity, resource, or a complete course section only to a particular group of learners.
- To create groups in your MoodleTMcourses, you can start from Administration > Course administration > Users > Groups. Groups can also be created automatically through the “Auto-create Groups“ option.
For a detailed explanation about creating groups in the MoodleTM course, check out the MoodleTM Docs.
A cohort is a group of students all enrolled in the same course. Whereas a group is a subset of students enrolled in a particular course. Groups can help you manage various activities within a course, whereas a Cohort is a system-wide or course category-wide set of students.
Learn how to create a cohort from Moodle documentation.
How To Create a Cohort??
- Go to the main menu, and navigate to the Site administration → Users → Accounts → Cohorts page.
- Click on the Add button on the Cohorts page. After this, the Add New Cohort page will be displayed.
- Give a suitable title for the cohort. You will see this title when you work with the cohort.
- Now, enter a Cohort ID for the cohort. If you add learners in bulk to this cohort, this ID will help you specify the cohort.
- Write a Description that will help you and other admins remember the purpose of the cohort.
- Click on Save Changes and you’re ready to add students to the cohort.
Adding Students to Cohort
You can add learners to a cohort manually by searching and selecting them. You can also add your learners altogether in bulk by uploading a file to MoodleTM.
Once you add a learner to a cohort, they will be enrolled in all the courses to which the cohort is synchronized. Similarly, when you remove a learner from a cohort, they will be unenrolled from all the courses to which the cohort is synchronized.
How To Add Students
Open the Cohorts page, pick a cohort to which you want to add students, click on the people icon to assign them.
A Cohort Assign page will be displayed. On the left-hand side panel, you’ll see learners that are already in the cohort. And on the right-hand side panel, you’ll see learners that can be added to the cohort.
Step 8 – Start forums to encourage group discussions
When you integrate forums in your MoodleTM site, it helps to bring learners together which is now becoming a topic of discussion. Group discussions enable learners to easily communicate or socialize with each other.
Forums can increase the learner’s engagement across your MoodleTM site. More engagement also means an increased rate of course completion!
Here’s how you can easily create a discussion forum in MoodleTM:
- Open a MoodleTM course homepage, pick a course you would like to create a forum for.
- Click on Add an activity or resource, from the activity chooser. Select Forum.
- You get two options here, forum or open forum. Choose the open forum.
- Give it a title, describe the activity and you can always click the display description on the course page.
- Display recent posts on the course page, it can be toggled on and off
- Now choose a Q&A forum
- Under Attachments and word count, select the maximum attachment size for attachments to forum posts and the word count of each forum post.
- There are more options such as add ratings to the forum, and your learners also get to subscribe to a forum with the ability to unsubscribe. So you can add them as well.
- You can also place any necessary limitations on forum posts under Discussion locking and Post threshold for blocking.
- In the remaining page sections, make other selections you may need and click Save.
Step 9 – Add other interesting functionalities you might need –
Now, you got your MoodleTM site up and running. Great! What comes next is very important – Having forms on your site and some extra essential features to complete your perfect LMS.
Build quick forms to get important information
But why do I need forms, you ask? Forms are essential for query resolution, lead generation, and customer retention on any website, not just e-learning sites. Forms can be a great tool to help visitors connect with you better on your e-learning website.
They act as a communication portal to help collect a user’s contact information, pre-enrollment inquiries, or student support, and thereby improve the overall user experience.
Unfortunately, MoodleTM does not have a web form builder. So, to create forms on your MoodleTM site, You need to have some knowledge of HTML.
Without forms, you may not get important feedback from your learners that can be useful to fix some problems.
In order to overcome the problem of coding, you can use some simple solution to your MoodleTM site that doesn’t require any knowledge of coding. We recommend a well-rounded forms solution for MoodleTM – such as Edwiser Forms.
With a holistic plugin like Edwiser Forms, you can add high-converting forms and seek all the important information for FREE!
Add a faster grading tool
If you want to manage to grade more easily, you need to add a grading plugin. And for beginners, the traditional way of Grading in MoodleTM can be tricky.
Luckily, you can make the task of grading simple by installing a grading plugin that’s convenient for you. So, you can get yourself a smart grading tool like Edwiser RapidGrader. It enables you to assess multiple students and questions at once with much-needed flexibility.
Sell your courses efficiently around the world
Don’t limit your valuable courses to just a group of learners but share them with the world! What we mean is – sell your courses online.
A lot of moodlers sell their courses online to earn some more money. This is possible by connecting your MoodleTM LMS & WordPress via Edwiser Bridge.
By selling your Moodle courses online, you’d be teaching to learners from any corner of the world. You’ll be connecting with audiences on a global level! Isn’t that amazing? That’s the beauty of e-learning!
Second, you can curate and sell different courses with subscriptions, memberships, or a range of products to increase your earning potential.
A plugin like WooCommerce can help you sell e-courses, and even physical books, DVDs, and other course materials. So, It’s not just limited to selling, you could even schedule sales or offer discounts to make people buy more!
After installing Edwiser Bridge, you may need to use a reliable payment gateway too. We believe this article would help you make an ideal decision.
You can create an automated e-commerce Store of Courses with Edwiser Bridge PRO. It lets you handle payments with multiple gateways to give you a smooth course selling experience.
It allows you to track your order management, transaction history and manage everything with PayPal. You can trust PayPal with refunds as well.
We understand that relying on an online plugin to manage your transactions can be risky! But don’t worry about your hard-earned money, because Edwiser Bridge + WooCommerce is well-equipped and trustworthy when it comes to online transactions as it supports 160+ global payment gateways.
Final word
Well, that’s a wrap for today. We understand that the above steps may seem like a lot but once you get started with the first step i.e picking an ideal theme to enhance your interface, you’ll find it motivating to follow the remaining steps.
Every LMS needs to look attractive to attract users and a great design with some additional features can leave a great impact!
If you want to win the race in terms of experience and design, you just need to use Edwiser RemUI and the custom page builder feature. All other things shall fall in their place making life easier for you.
Get cracking with building attractive MoodleTM pages faster, check out the custom page builder demo.
Kickstart your process of building new MoodleTM pages faster in half the time with Edwiser Custom Page Builder
All the best!!