All you need to know about Moodle Plugin – Custom Certificate!
Custom Certificate
Launched in January 2013, Custom Certificate lets you generate customizable certificates for Moodle Courses.
How to begin with Custom Certificate
- Install Custom Certificate
- Head to a course of your choice
- Turn editing ‘ON’ in the settings menu
- Find the section you want to add a certificate to
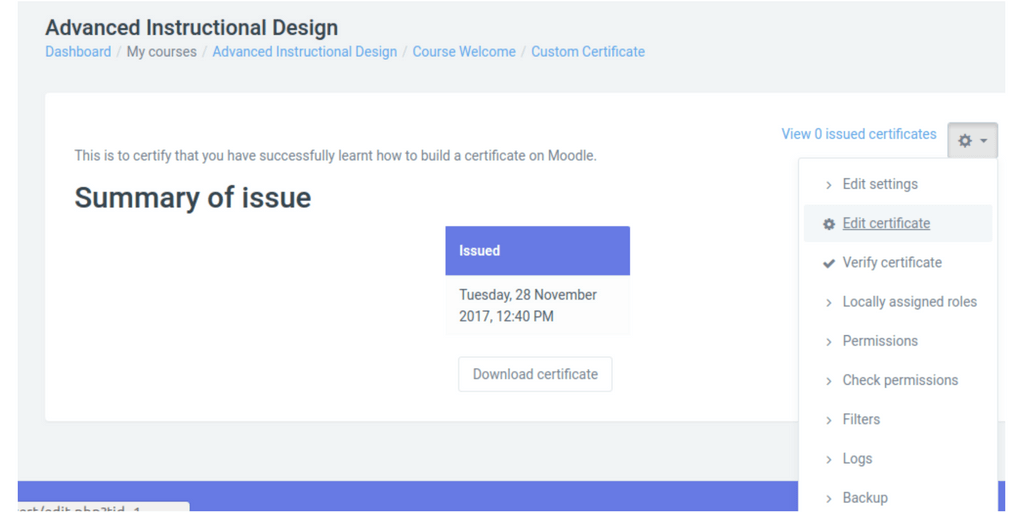
- Click on “Add Activity or Resource”
- Click on “Custom Certificate”
How do I create a Certificate?
There are two main steps to creating a certificate for your Moodle course:
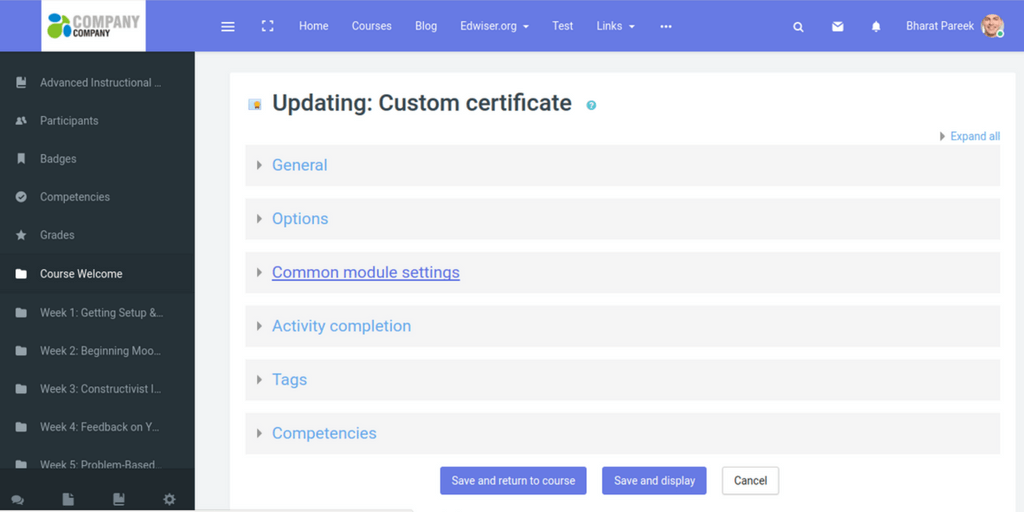
>Edit Settings
You will see six main settings:
- General- Enter the name and description of the certificate you wish to create
- Options- Set who all are allowed to view the certificate, enter the duration a student has to compulsorily complete before getting certified, decide the default email list of the certificate
- Common Module Settings- Enable/disable viewing the resource to students, type the ID number of the activity and make groups of eligible students for the course
- Activity Completion- Track completion of the course and enter the expected date of having completed the course
- Tags- Add tags if required, it is not a mandatory field.
- Competencies- Link course competencies if there are any and select an automated action for completion of an activity
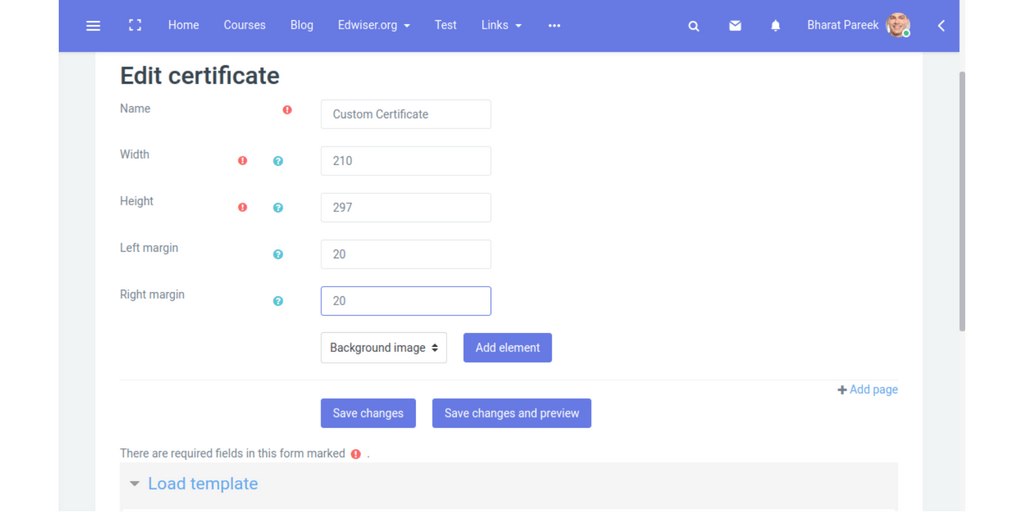
>Edit Certificate
There are three kinds of customisations you can make to the certificate:
- Name & Description
- Dimensions of the Certificate
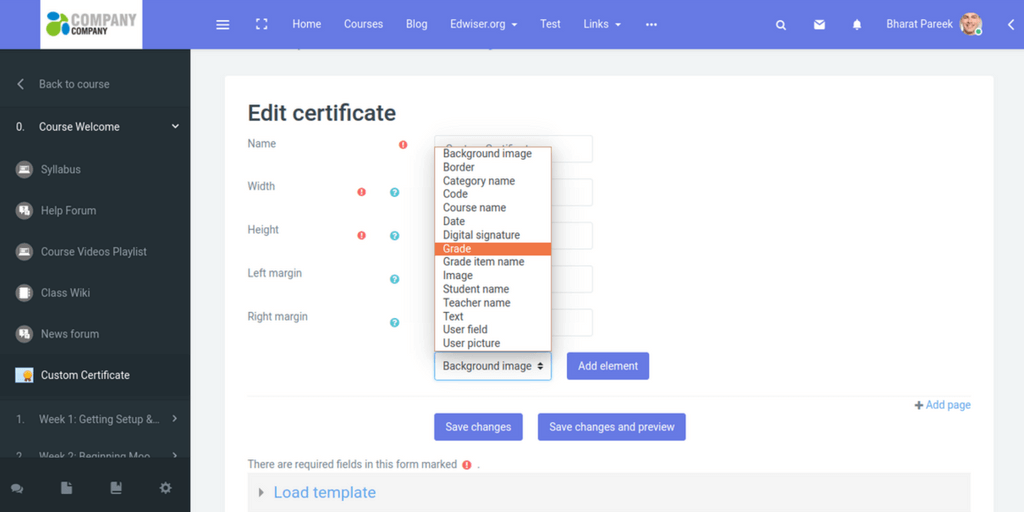
- Elements of the Certificate
My Review
What I liked
Custom Certificate
- Has advanced settings for the course author
- Is easy to use
- Has small number of steps to complete creating one certificate
What I did not like
- The biggest problem with the plugin is that it does not provide an instant preview on the screen. After making all the changes, you have to save it and on view the certificate on another page. It is inconvenient for any user to see every small change on another page.
- For deleting an element, it redirects you to a delete confirmation page – which is again a waste of time. It also resets all the changes you had just made in the editor.
- You can not upload or use certificate templates, which means you will have to ultimately use the time-consuming Certificate Editor.
To Conclude
Custom Certificate can be upgraded to a feature-rich customiser with immense potential.
If it comes up with an interface like most visual editing tools have, it will be really helpful to course authors and site managers on Moodle.
To save time and repeated efforts, page redirection could be avoided.
If the import of templates and fonts is allowed, the standard of the certificates would easily rise, adding value to your Moodle Course.
On a scale of 1-5 with 5 being the highest, Custom Certificate scores 2.5/5 for its usability.
In the upcoming blog, we’ll see the review of EduMessenger! For any suggestions of plugin review, tell us in the comments below.


Apty documented features of Custom Certificate.
I wish how to know end-to-end activities to implement this plug-in.
i.e. post configuration of the certificate, how one can use this certificate as activity
generating certificate only when the student has completed a Quiz activity and scored passing grade.
Hello!
Thank you for reaching out to us. We’d suggest you access the plugin documentation here. https://docs.moodle.org/35/en/Custom_certificate_module
It’ll guide you through the process.
For any queries/doubts in the documentation, if any, do let us know. 🙂